Monday, September 5, 2011

Toddler Cake

 Sorry guys.  I've been just too busy with two kids and no husband home, so I haven't made any cute cakes in a awhile. But I did let someone cute make a cake:


I did the sides and edges and helped my cute little guy hold the frosting bag and let him go to town! He sure thought it was fun. I think he did a great job, don't you?! Very Avant-garde. I especially like the poke marks.  He tried to lick the top of the cake afterward, but I thought that would have been overkill, not to mention unappetizing.

Wednesday, June 22, 2011

Father's Day Cake


So I didn't make my husband a cake for his birthday a few months ago.  He hasn't forgiven me for it (I thought he was sick of cake so I got him donuts instead, sheesh!) so I figured I had better make him a father's day cake before he divorces me. 
Seriously though, I had a ton of fun making this cake.  Unfortunately, I was in a rush (that happens way too often!) so I was a bit sloppy on the tie.  I also wish I would have made the shirt a different color.  It's just so....white.  It makes it hard to see the detail. 
I wasn't very original in doing this cake either---I just copied the design after some other cake I found while googling "father's day cakes" for ideas.  Since the cake was so white and the tie was so brightly colored and I was in a huge rush (had some friends over for dinner and I wanted to make sure we all had cake for dessert!), the tie stood out in a really bad way.  In order achieve some balance, I improvised and put some blue fondant on the sides, I guess it is supposed to be tissue paper or something.  If I had more time I would have thought of something better.  I think the cake turned out okay despite the glaring white-ness. 
I also tried out a new filling.  Pie filling, actually.  It was key lime and I liked it, but I think it may be a bit tart for the likes of most people, and a bit gloopy for the likes of cake decorators.  It was paired with white cake and white frosting.  Yum!

**Also, this cake commemorates my two year anniversary of Cake Decorating!!  Yay!**

Monday, May 23, 2011

Birthday Cake

 Here is a cake I did a few weeks ago for a friend's little girl Eva.  I was 9 months preggo so I didn't feel like doing anything too elaborate and drag out all my fondant supplies, so I just did the entire cake in buttercream. Eva's party theme was Easter so I thought it would be fun to use my oval cake pan for an "egg" on the top of the cake.  I tried to go for an Easter-basket look with the basket weave, flowers, and grass, not sure if I pulled it off entirely though.  I used the confetti cake mix, and everyone must have liked it because there was no cake to take home!     
 The birthday girl
 
All gone!

Sunday, May 22, 2011

Frozen Buttercream Transfer Tutorial

This was my first frozen buttercream transfer and there are a ton of other great tutorials out there, but here's mine regardless, hope it helps!  They are really not too difficult, though slightly time consuming.

The first thing to do is find a picture you like.  Or draw it.  Whatever the case, if you're a beginner, you will want a picture that is fairly simple (not too much detail).  I just printed mine off the internet.
Tape the pic to a cookie sheet and tape (duct tape works best!) either parchment paper or wax paper (doesn't really matter) over it.


 Now the fun part: Do the outlines FIRST.  Simply take black icing (or whatever color you wish) with a tip 2 and trace over the outlines of the drawing.  I mixed black gel coloring with chocolate fudge frosting, it's much easier to get a nice black that way.

 So pretty!


 Put the buttercream transfer in the freezer and make all the colors that you will need for your transfer.  Unless you already have the colors made, this is the part that makes this project so time consuming.  I only have one #2 tips, so I just used disposable icing bags, the parchment paper ones.  With duct tape.  I like duct tape.  I cut a TINY hole at the tip of each bag for the icing to come out of.


 Now the "tricky" part.  Though not so tricky if you understand that now you will be filling in everything in the FOREGROUND FIRST.  For this picture, it was the eyes, basket, and the polka dots on the vest.

 Now you will be filling in the background and the rest.  There was red outline in the vest as well so I filled that in.  And the rest of the vest was yellow so I filled that it last.  So depending upon how detailed your picture is, you will basically be layering the colors and detail with icing--and remember foreground first!

 Fill in the rest of the colors.  Again, it will depend on your picture.  I filled in the rest of the bunny which was just white.  The nice thing about buttercream transfers is that you don't have to be perfectly neat about it, especially with the background stuff.  You don't need to stay inside the lines, at least within the picture.  Gently smooth the icing so that there are no open spaces (make sure the icing covers every inch of the drawing or you will have gaps which are ugly!)


 Your last step will be covering the entire transfer with icing the same color as your cake icing.  Try to get it as smooth and even as possible, but don't worry if it's not absolutely perfect.  Be firm, but gentle.  Now throw it in the freezer for AT LEAST on hour; overnight if possible. 


I forgot to mention to put your buttercream transfer in the freezer from time to time (in between steps definitely) so it holds its shape.


Next, CAREFULLY place your transfer where you want it on your cake.  Be careful  because any narrow part in your transfer will be a weak spot.  For mine it was the neck of the bunny.
 

 Now SLOWLY and carefully peel the paper away from the transfer. 

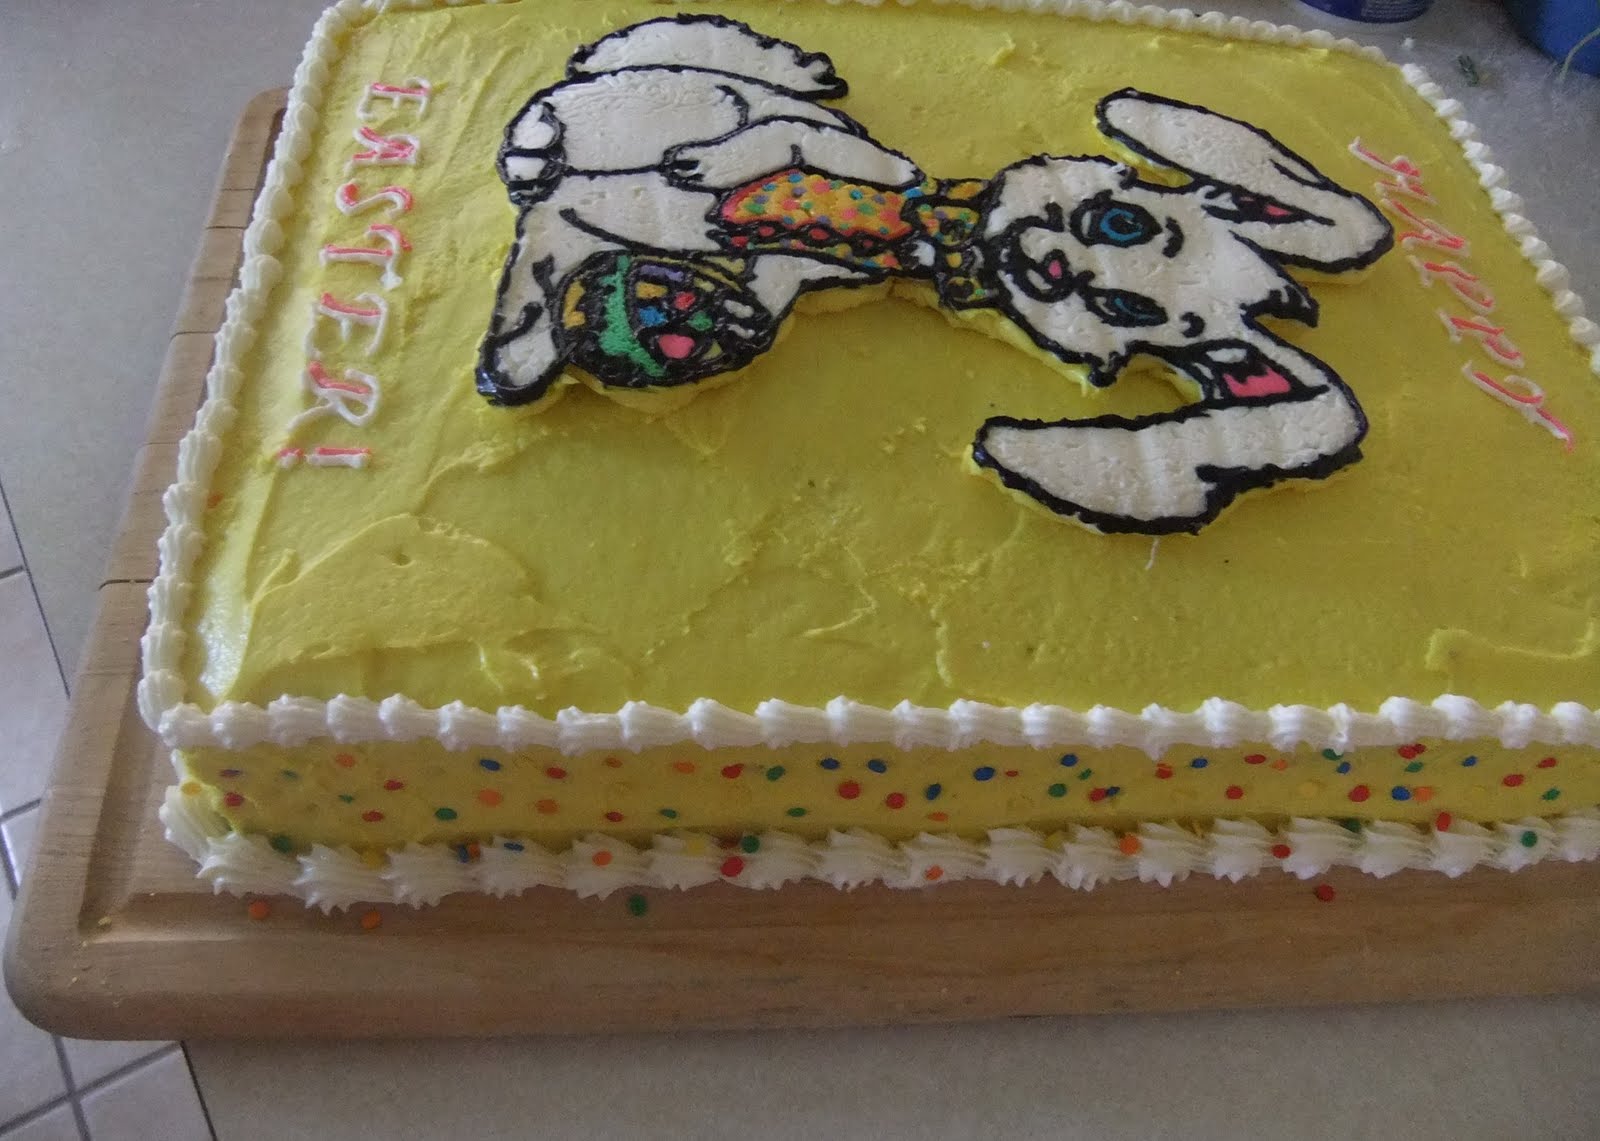
 And you're done! Except I went around with the black icing and re-did some of the outline-some of it seemed to come off with the paper.

Now you have a cool, professional looking picture.  And the best thing about frozen buttercream transfers is that you can use pretty much ANY picture you'd like! They make very personalized cakes.

Tuesday, April 26, 2011

Easter Cake

Here is my Easter cake! I made it for an Easter party-thing, I decided since I signed up to bring dessert I might as well make a cake!  This cake was a new experience for me.  For one, I've never made a true sheet cake before (very easy) and I've always wanted to try a Frozen Buttercream Transfer (I will post the tutorial later) and I got to try it out on this cake.  It wasn't too hard and turned out pretty cute I think.  Besides the buttercream transfer, it was a piece of cake decorating the rest (ha. I'm hilarious huh). 
I totally spaced it while picking out the cake mixes...I originally wanted to have it all white cake with key lime filling, but I accidentally bought all different cake mixes! Duh.  So I improvised and used chocolate for the bottom and white cake for the top, with strawberry filling.  Sounds yummy, right?  Not really.  The flavors just didn't mix.  And I couldn't even taste the filling, even though it tasted delicious when I tried it by itself.  Also I really hate the buttercream recipe I have (I use the Betty Crocker recipe).  I made the frosting from scratch, and I think it is just nauseatingly sweet.  So much for all my hard work!  Bleeeech.  I need to find a new recipe that is a bit more mild.  Sorry about the not-so-good tasting cake, for those of you who were subjected to it!  I think it turned out cute enough for being just a sheet cake though. 


Wednesday, April 6, 2011

Ladybug Baby Shower Cake

 Here is my latest cake! It was super fun to make.  I made it for my friend who is having a girl and is due the same day as me! Her shower theme was ladybugs, and she requested this cake.  It is strawberry cake with strawberry frosting.  The lady bug, however, is not cake and certainly NOT edible!  The body is made of styrofoam and the head is made from a little plastic ball I cut in half (sorry Gabe!).  I covered the styrofoam and half-ball in fondant, and painted the face with black food coloring.  The antennae are pink wire.  For the name I used my clay extruder and I put ladybugs and a few flowers around the cake.  The mother of honor loved the cake so I'm glad how the cake turned out!    


Sunday, April 3, 2011

Train Cake

 My sweet little boy just turned two! In honor of that, I threw him a train-theme birthday party (he is obsessed with trains).  Of course no party is complete without a cake!
Instead of the two-tiered fondant cake like I tend to do a lot, I thought it would be more fun and kid-friendly if I made a train out of cake.  It was fun and relatively simple to make, though I did have a problem with the back end of the engine falling over onto the yellow car next to it.  Oops.  Probably should have put more supports in it.  Oh well.  It actually held up fairly well despite that.  I let my little sister-in-law decorate it with candy.  It's not super professional-looking or amazing, but I think it was just perfect for a 2-year old's birthday party!


Wednesday, March 23, 2011

Ships Ahoy! Baby Shower Cake

 I threw my friend a baby shower the other day, and her theme was "Ships Ahoy! It's a Boy!".  I had fun making all the decorations but especially the cake.  The bottom is the cinnamon roll cake mix and the top is confetti cake mix, as requested by the mother-of-honor.  The rope border was especially fun to make...quick, easy, and clean-looking thanks to the clay gun extruder!  I attached the sail boat to the cake by using a short plastic dowel rod.  I stuck the stick end of the sail boat (a popsicle stick was used to support and connect the boat).  Then I put some gumpaste in to keep it from tipping, and then stuck the whole thing in the cake.  It's an easy way to keep cake toppers in place! The lettering annoys me, but that is because the red fondant I used was too soft so I was very difficult to get it to go on the cake right.  Oh well.  Everyone seemed to like the cake so it's all good!


Wednesday, March 16, 2011

Cake Decorating Demo

New cake coming soon!  I promise.  In the meantime, here are some pics of a little activity my church had about a month ago. My friend and I were asked to do a few demonstrations on basic cake decorating skills for the women.  It was fun but my presentation skills are severely lacking, so I hope that most understood what I was trying to teach them!  My demonstration was how to do the Wilton flower (and the flower spray), which I didn't expect anyone to get right, let alone try! But I had a few girls surprise me when it came to the rose, because that is not an easy cake decorating skill to just pick up.


 See that huge belly on me? That's from eating too much cake.  Just kidding.  It's a baby belly :)


 The rose demo...


 Some of the ladies decorating their cookies

A few of my favorite girls :)

My flower spray.  Man it was soOo SO HOT in there I thought I was going die!